 Sandbox Edition
Game-Maker Pocket
DOS games in your pocket
ESP32 / touchscreen / microSD
Flash the Pocket Player onto a small ESP32 touch-screen board from your browser. Choose your board, choose what to install, then connect over USB.
Install Game-Maker Pocket
1. Pick your board → 2. Pick an install → 3. Connect and install
Before you start
Use desktop Chrome or Edge and a USB data cable. A charge-only cable will power the board but cannot install the player.
Open this site over HTTPS. Firefox, Safari and phones cannot install firmware here.
1Pick your board
Illustrations show the front of each board. Check the model and touch type, not just the appearance. Not a match? Check other boards.
2Pick what to install
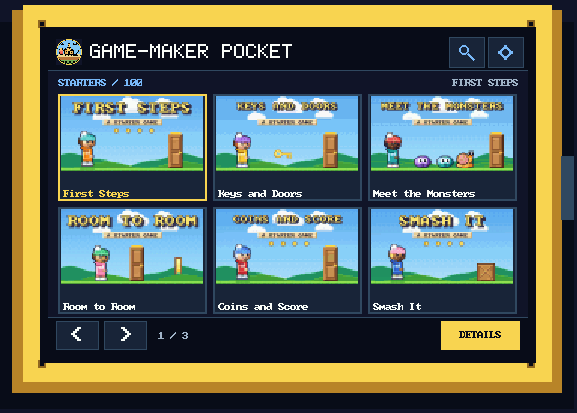
Which five starter games are included?
Virus Blaster, Snowbound, KEEP IT BRIEF!, Sandcastle Knight and Where’s the Remote?!
3Connect and install
- Plug your board into the computer with a USB data cable.
- Review your choices and confirm the replacement below.
- Choose Connect and install, select the board’s serial port, then choose Install in the installer.
Keep the cable connected until the installer says it is finished. Installation takes a few minutes.
No board selected.
Pick a board and check the confirmation box to show the install button.
After installation
The board restarts into Game-Maker Pocket. If it stays on the install screen, press its RESET (RST) button or unplug and reconnect it.
On a new 2.8 inch board, follow the display setup and touch calibration prompts. The 3.5 inch board needs no touch calibration. Open a game, then choose Play. With Player only, add games first.
Send games over USB to store games on the board, or add games on a microSD card.
Troubleshooting
No serial port is listed
Try a known USB data cable and another USB port on your computer. Connect directly instead of through a hub. Close other tabs or programs using the board, then try again in desktop Chrome or Edge.
If no port appears, check the USB driver below.
The board will not connect
Close serial monitors and disconnect from the Send games over USB tab. Try again while holding the board’s BOOT button; release it when installation starts. You can also hold BOOT while plugging in the cable.
I picked the wrong board, or the screen looks wrong
Check the model on the back, select the matching board in step 1, and install again. The installer checks the ESP32 chip but cannot distinguish these two screen sizes. Installing again replaces games and control settings on the board.
On a 2.8 inch board, wrong colors or orientation can be fixed in Settings → Display → Panel setup. If the display is blank or unreadable, hold BOOT for about two seconds to try the other display driver. For a different model or a 3.5 inch board with resistive touch, check other boards.
Do I need a USB driver?
If a known data cable works but your computer still sees no serial port, the USB-to-serial chip may need a driver. Check the chip marking or the board seller’s instructions for CH340/CH341 or CP210x, and get the matching driver from its manufacturer (WCH or Silicon Labs). Reconnect the board after installing the driver.
What gets installed and what is kept
Each option installs the bootloader, partition table, player firmware and on-board library. Player + starter games includes five games; Player + Starter courses includes 106 lessons; Player only includes the player’s font and an empty library.
Installation replaces the 3 MB library area, including games, control settings and any other files stored there. Back up your files before installing. Display setup, touch calibration and other values in the separate NVS storage area are kept. The microSD card is never written by the installer.
Adding games to a microSD card
The starter games (or the 106 Starters) are already on the board if you chose them. Any other game goes on a card, one .GMP file each. No card? The Send games over USB tab puts them in the board's flash over USB.
- Get games. On the Game-Maker: Sandbox Edition site, open a game and choose Download, then Pocket Player (microSD). It saves
NAME.GMP. - Card. A microSD card formatted FAT32. Cards from 2 to 32 GB usually come that way; bigger cards usually come as exFAT, so reformat them as FAT32 first.
- Folder. Make a folder named
pocketat the top of the card and copy the.GMPfiles into it. Files in subfolders are ignored. - Names. The part before
.GMPis 1 to 11 letters, digits,_or-(no spaces). The extension may be upper or lower case. - Put it in. Switch the board off, insert the card, switch on. Or, with the board on, open Settings, Card, Rescan. Card games show a yellow SD tag; games kept in the board's flash show On board. If a game is on both, the card's copy is the one listed.
Good to know
- The list holds up to 512 games. A game whose id is already listed (a Starter, say) is skipped.
- A file the player can't read as a game pack (wrong name, not format 1, damaged) is skipped without a message: it just isn't listed.
- The player writes only inside
/pocket: a library cache (LIBRARY.CCH) and display setups inboards/. Keepboards/.
Troubleshooting
- "No card": the card didn't mount. Reseat it, then Settings, Card, Rescan.
- "Can't read the card": it should be FAT32. Reformat as FAT32 (MBR) on your computer.
- "No pocket folder": the folder must be named
pocket, at the top of the card. - A game is missing: check the name rules, that the file is in
/pocketitself, then rescan.
Source: scanCardBatch and mountSD in src/main.cpp, src/cardmsg.h, docs/FIRMWARE.md.
Send games over the USB cable
Add games to the board without a microSD card. Pick .GMP files (the Pocket Player (microSD) download on the Game-Maker: Sandbox Edition site) and they are stored in the board's own flash. Desktop Chrome or Edge only.
Not connected.
On the board
Add games
Each piece is checked on the board and the game appears only when all of it has arrived. A big game takes a few minutes (the cable is slow). A name longer than 8 letters is shortened. A game with the same name replaces the old one.
Other or unknown board
The two boards on the Install tab are the ones this firmware was written for. Other ESP32 touch-screen boards can look the same but differ in the display chip or the touch chip. Read this before flashing one.
Fixed when the firmware is built
The pins, the screen size (320 x 240 or 480 x 320), the touch chip (XPT2046 resistive in the 2.8 build, GT911 capacitive in the 3.5 build), the 3.5 build's display driver (ST7796) and the chip family (plain ESP32). Source: src/board.h, src/screen.h, platformio.ini.
Adjustable on the device
Only the 2.8 inch build has the display setup (first start, then BOOT or Settings, Display, Panel setup): driver (ILI9341 or ST7789), inverted colors, red and blue swapped, mirror and orientation, and touch calibration, saved per chip. The 3.5 inch build has no setup screen, so a wrong picture there can't be fixed on the device.
Variants
| Board | Status | Why |
|---|---|---|
| ESP32-2432S028, usual ILI9341 | Works with setup | The supported board: pick 2.8 inch. |
| ESP32-2432S028 with two USB ports ("2 USB", ST7789) | Works with setup | The firmware has an ST7789 driver for this revision: choose it in Panel setup (or hold BOOT 2 seconds on the list). From docs/FIRMWARE.md; not tested on one here. |
| 28 board with inverted or red/blue-swapped colors | Works with setup | Color bits in Panel setup (src/displaysetup.h). |
| ESP32-3248S035 with resistive touch ("R") | Needs a different build | The 3.5 build reads a GT911 capacitive chip only (src/gt911.h); no build here pairs 480 x 320 with resistive touch. |
| ESP32-2432S024 2.4 inch (R or C) | Not supported yet | No build for it. Guess, unchecked: pins close to the 2.8, and the C version has a capacitive chip. |
| ESP32-2432S032 3.2 inch | Not supported yet | No build for it. Guess, unchecked: its own touch wiring. |
| ESP32-S3 touch boards (larger Sunton and similar) | Not supported yet | A different chip. The installer says "Your ESP32-S3 board is not supported" and writes nothing (ESP Web Tools code in ewt/). |
Facts beyond the firmware's own notes are marked as guesses and not checked. Community lists: witnessmenow's Cheap Yellow Display notes and rzeldent's Sunton board definitions (the 3.5 inch board's speaker pin comes from rzeldent's definitions; see NOTICE.md).
Back up and restore with esptool
ESP Web Tools can't back up. With esptool installed (pip install esptool) and your board's serial port as PORT:
esptool.py --port PORT read_flash 0 0x400000 backup.bin
esptool.py --port PORT write_flash 0 backup.bin
The first line saves the whole 4 MB flash (several minutes); the second puts it back. A board with another flash size needs that size.
Install the 2.8 inch build on a similar board
Check the confirmation box to show the Install button.
The installer checks the chip: anything that isn't a plain ESP32 is refused. It can't tell the 2.8 board from the 3.5 board; both are plain ESP32 chips.